 EN
EN

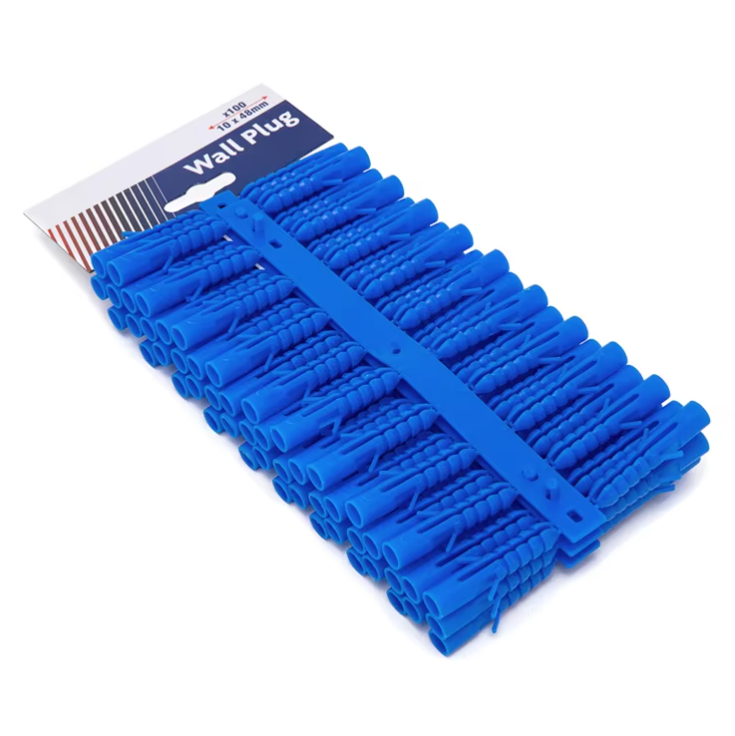
Match the Wall Plug to the Wall Before Anything Else
A wall plug is a small plastic anchor that lets a screw bite into masonry, brick, or concrete without cracking the surface. The first mistake on most jobs is treating every plug as universal. A plug sized for solid concrete can fail in hollow brick, and a plug made for hollow block may spin in a dense poured wall. Base material controls drill diameter, hole depth, screw size, and anchor geometry. EOTA's ETAG 020 guideline for plastic anchors in concrete and masonry separates performance by base material and application, not by plug color or retail label. In the field, tap the surface and listen for hollow spots. Check whether the area is painted plaster, gypsum board, mortar, brick, or concrete. If the wall is soft or crumbly, a standard expansion plug may not hold. A chemical anchor or a specialized hollow-wall fixing may be the honest answer. The table below gives a practical starting point, though local codes and manufacturer data always win.
| Base material | Typical drill size for 8 mm plug | Hole depth | Common screw size | Field note |
|---|---|---|---|---|
| Solid concrete | 8 mm | 50 mm | 4.5 to 5 mm | Use hammer mode, clean dust |
| Solid brick | 8 mm | 50 mm | 4.5 to 5 mm | Reduce hammer pressure |
| Hollow brick | 8 mm | 55 mm | 4.5 to 5 mm | Let plug expand behind web |
| Gypsum board | Toggle or hollow-wall anchor | 40 mm plus | 4 mm | Plastic plug alone may pull through |
Drilling the Hole Without Turning It Into a Crater
Use the correct bit and check it before drilling. A worn carbide bit can drill an oversized hole, which is the quiet reason many wall plug failures start. For a plastic wall plug, the drill diameter usually matches the plug's nominal size. An 8 mm plug gets an 8 mm hole. In hard concrete, the bit may wander before it bites. A small pilot mark with a nail or center punch helps. Wrap tape around the bit to mark depth. Drill straight, keep the drill steady, and avoid wobbling the bit from side to side. Hammer mode belongs on masonry, not on gypsum board or soft tile. If the bit is dull, replace it. Heat and chatter can enlarge the hole, and no plug will fix a hole that is already too wide.
Why Hole Cleaning Is Not Optional
Dust and grit act like tiny ball bearings inside the hole. They stop the plug from gripping the wall, and they can make the screw spin under load. After drilling, blow out the hole with a pump, brush the sides, then vacuum the residue. Do not wash the hole with water unless the anchor system specifically calls for it. During a retrofit at a chemical plant in southern China, a crew installed anchors into old concrete without cleaning the holes. The first torque check spun several plugs in place. New bits were used, the holes were brushed and vacuumed, and nylon plugs were set again. The wall had not changed. The installation method had. Cleaning takes seconds and prevents callbacks.
Inserting the Wall Plug So It Sits Flush and Grips
Push the wall plug into the hole by hand. A light tap with a mallet is fine if the fit is snug, but heavy hammering can crush the plug or drive it below the surface. The rim should sit flush with the wall. If the plug disappears too deep, pull it out and start again. If the plug will not enter, do not force it. The hole may be too small, or debris may still be inside. Re-drill at the same nominal size and clean again. Do not jump to a bigger bit just to make the plug fit. On hollow walls, the plug often needs to pass through plaster and open behind the void. Anti-rotation fins should engage the hole sides. Trim nothing unless the manufacturer's instructions say to.
Driving the Screw, Testing the Load, and Sourcing Consistent Packs
Match the screw to the plug. A screw that is too thin will not expand the anchor enough. A screw that is too thick can crack the plug or bind before the head reaches the surface. Drive slowly, especially with an impact driver. Stop when the screw is snug. Over-torque is a common reason a wall plug spins. If spinning starts, stop. Remove the screw, pull the plug, and inspect the hole. An oversized hole, dust, or a broken wall web is usually the cause. For light loads, a slightly larger plug may solve the problem. For heavy or safety-critical loads, step back and choose a different fixing method. Test with a gentle pull before the full load goes on. If the fixing shifts, rework it. Standard plastic plugs are poor choices for high heat, constant vibration, or heavy overhead loads. They work best in sound masonry with a correctly sized hole. For buyers sourcing wall plug assortments, consistency across sizes, colors, and packaging matters. Zhongsheng Hardware has supplied DIY hardware packs since 1993, with PS, PP, ABS, and PVC blister formats and production built around client requirements. That manufacturing background helps distributors keep repeat orders aligned and shelves stocked without surprises.